Home Security Smart Camera System Using Raspberry Pi
Using the Raspberry Pi 3B, Raspberry Pi Camera Module, Motion, and NO-IP, I was able to set up a fully functional home security camera system for a low cost
Home Security Camera Using Raspberry Pi 3B
Introduction
As I had to leave my house for a trip and I was worried about the security of my home, I decided to set up a quick and cheap home security camera system using a Raspberry Pi 3B.
Materials Needed
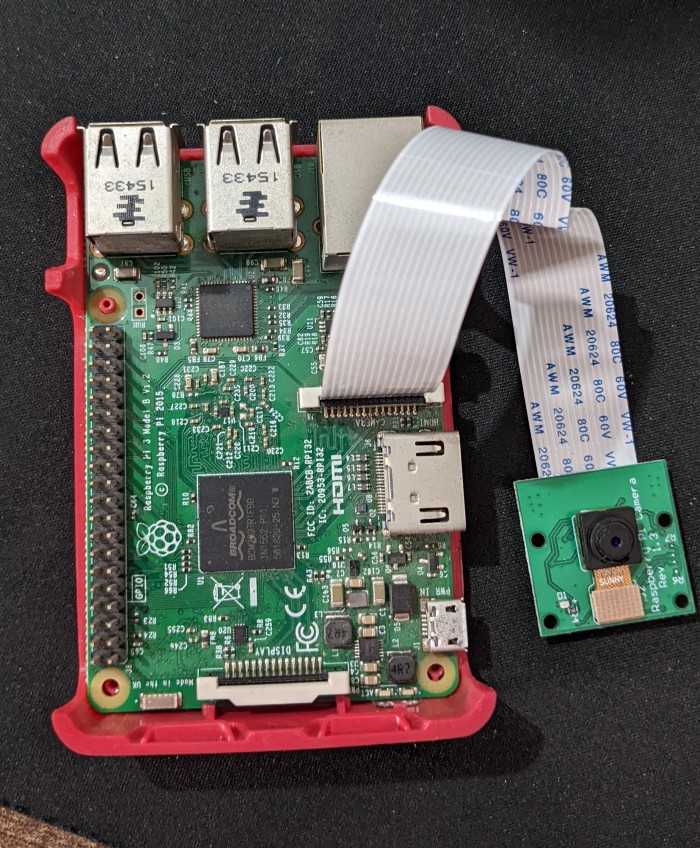
Raspberry Pi 3B
Raspberry Pi Camera Module
MicroSD card (8GB or higher)
Ethernet cable
Power supply
Case for Raspberry Pi (optional)
Software Needed
Raspbian Jessie (or later)
Motion (a motion detection software)
NO-IP (a dynamic DNS service)
Steps
1. Preparing the Raspberry Pi
Download and install Raspbian Jessie on your microSD card.
Insert the microSD card into your Raspberry Pi and connect the power supply and Ethernet cable.
Power on the Raspberry Pi and wait for it to boot up.
2. Setting up the Camera Module
Connect the camera module to the Raspberry Pi.
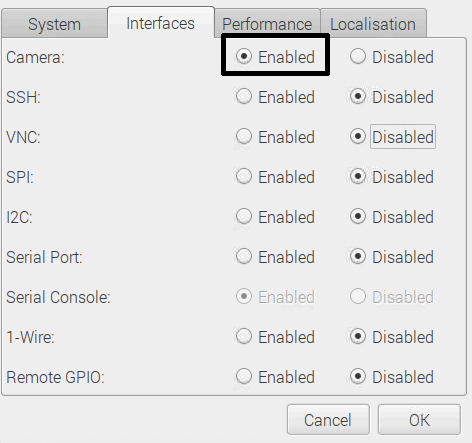
Run the following command to enable the camera interface:
sudo raspi-configNavigate to “Interfacing Options” > “Camera”
Select “Enable”
- Save and exit raspi-config.
3. Installing Motion
- Run the following command to install Motion:
sudo apt-get install motion
4. Configuring Motion
Open the Motion configuration file (/etc/motion/motion.conf).
Make the following changes:
Change
videodeviceto/dev/video0.Change
widthandheightto the desired resolution (e.g. 640x480).Change
framerateto the desired frame rate (e.g. 25).Change
qualityto the desired JPEG quality (e.g. 75).Change
target_dirto the directory where you want to store the images/videos (e.g. /home/pi/motion).Change
stream_portto the port you want to use for the live stream (e.g. 8081).Change
stream_localhosttooffto allow remote access to the live stream.Save and close the configuration file.
5. Creating a Folder for Motion
Create a folder in your home directory named
motion.Change the permissions of the
motionfolder to allow Motion to write to it:
sudo chmod 777 /home/pi/motion
6. Enabling Motion
- Run the following command to enable Motion to start automatically on boot:
sudo systemctl enable motion
7. Rebooting the Raspberry Pi
- Reboot the Raspberry Pi to apply the changes.
sudo reboot
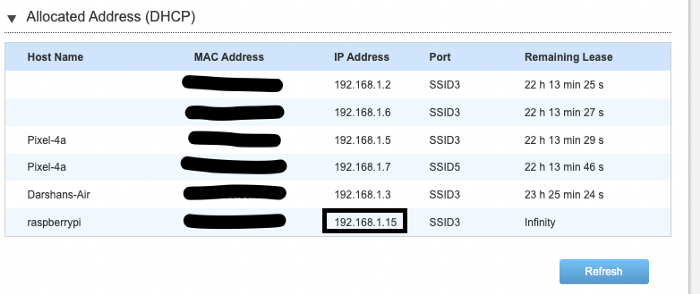
8. Viewing the Live Stream
- Open a web browser on your computer and go to the following address:
http://192.168.1.15:8081
- You should now see the live stream from the camera.

Note: Your IP will be different so you have to check what IP is given to your raspberry-pi.
9. Setting up Remote Access
Create an account on NO-IP.
Install the NO-IP Dynamic DNS Updater.
Follow the instructions provided by NO-IP to configure the Dynamic DNS Updater.
Port forward port 8081 on your router to the Raspberry Pi’s IP address.
10. Testing Remote Access
- From a computer outside of your home network, open a web browser and go to the following address:
http://yourdomain.com:8081
- You should now see the live stream from the camera.
Conclusion
Using the Raspberry Pi 3B, Raspberry Pi Camera Module, Motion, and NO-IP, I was able to set up a fully functional home security camera system for a low cost. This system allows me to view the live stream from anywhere in the world, giving me peace of mind while I’m away from home.
*I didn’t complete step 10 because my attempt was unsuccessful and there was limited time, yet I’ve included it for the readers’ reference.
Under: #gnu/linux , #tech , #how-to